
Categories
Overview
Categories organise the listings on the site into a browsable hierarchy. Manage them at Admin → Tables → Standard Categories.
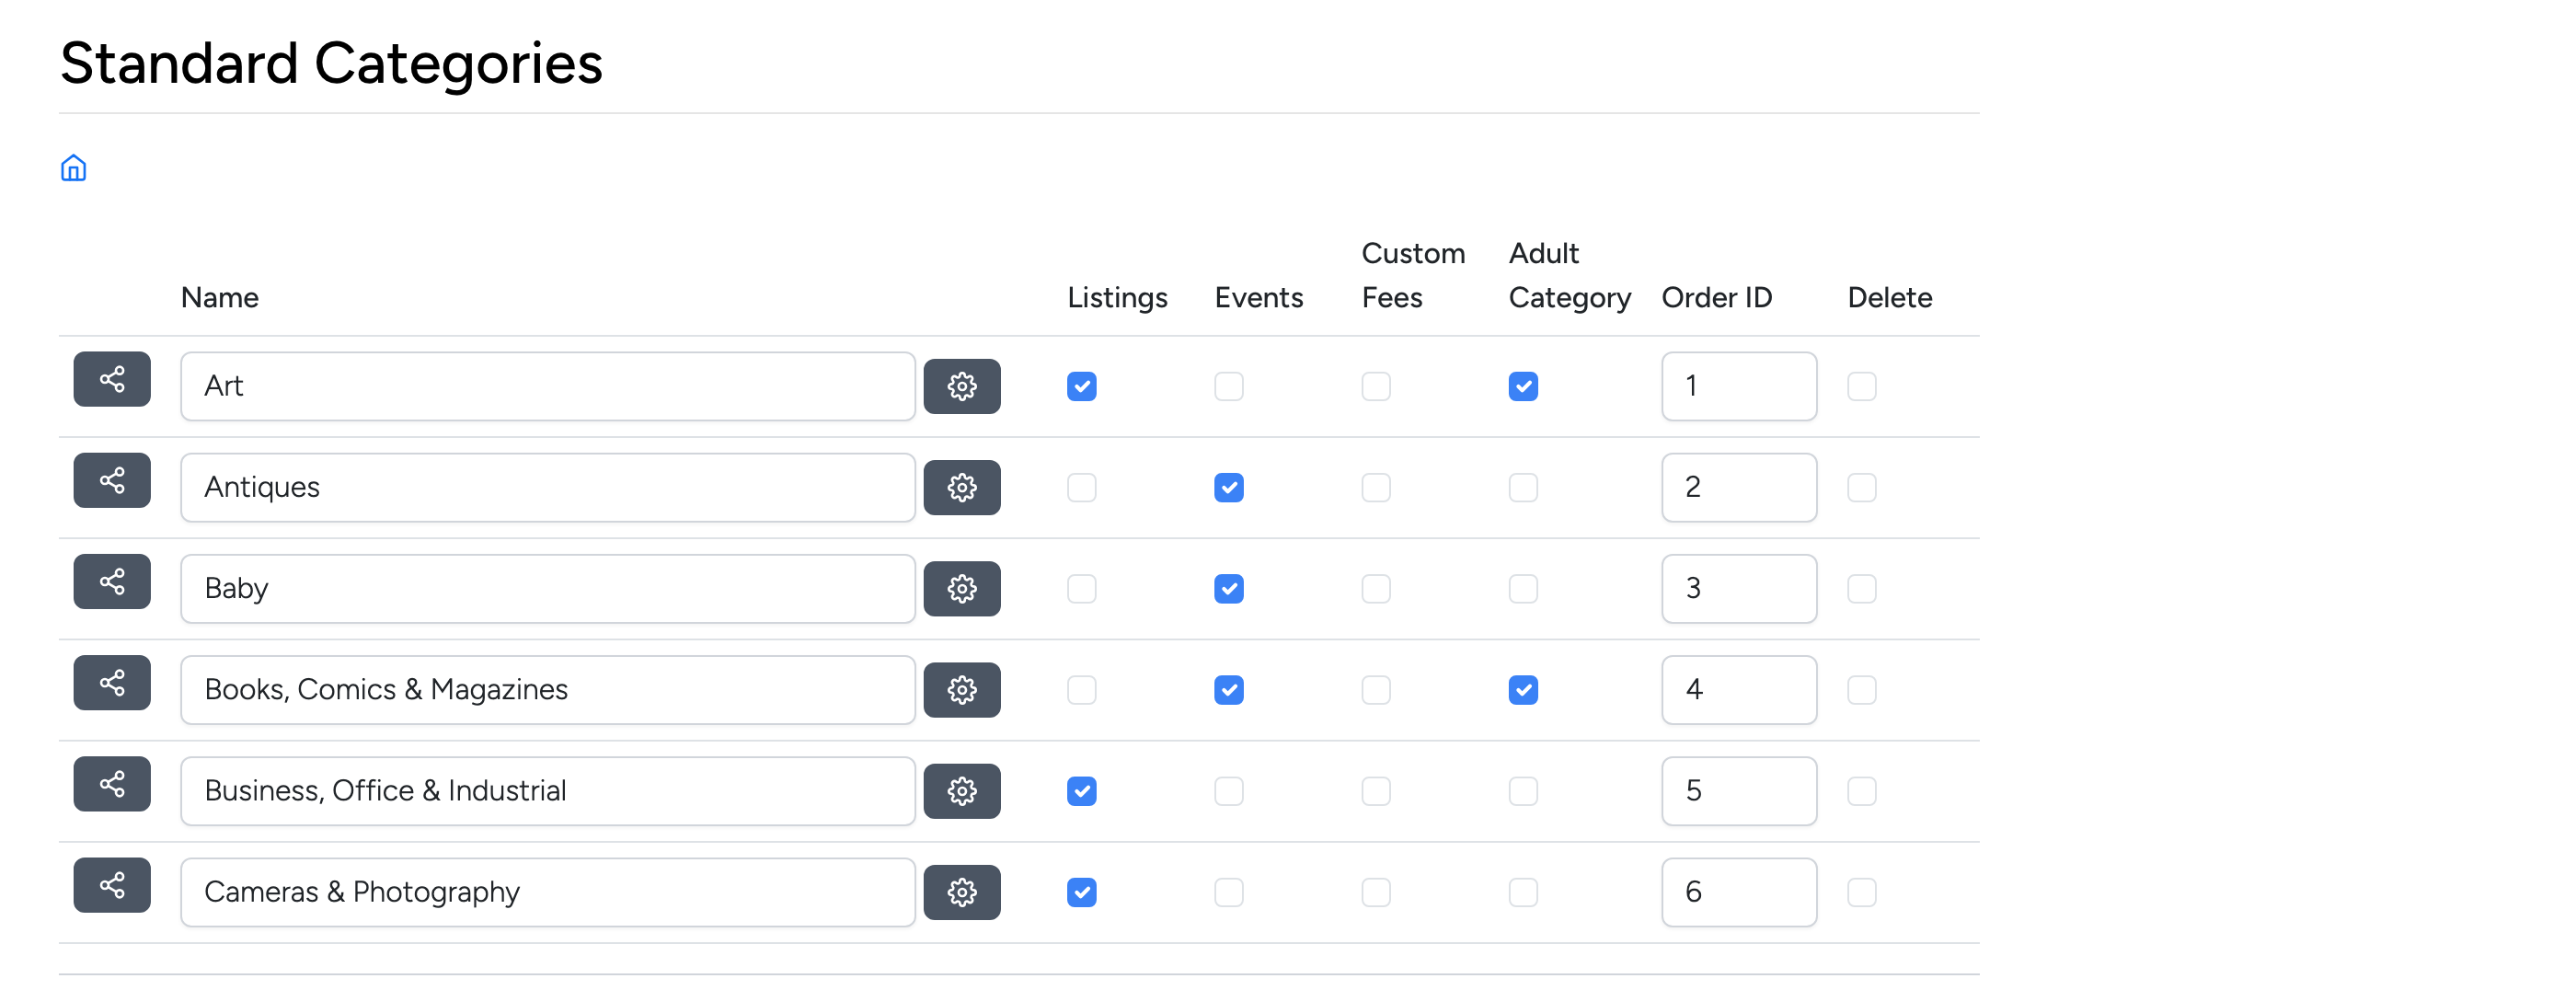
Each category row shows:
- Name — the category name displayed on the site.
- Listings / Events — whether the category accepts standard listings and/or auction events.
- Custom Fees — indicates if the category has its own fee schedule (overriding the default).
- Adult Category — flags the category as adult content, triggering the age verification splash page if enabled. See Adult Categories.
- Order ID — controls the display order. Lower numbers appear first.
- Delete — check the box and click Update to remove the category.
Use the arrow button on the left of each row to drill into subcategories. Use the gear icon to open category options.
Subcategories
Click the arrow button next to a category to view its subcategories. A breadcrumb trail at the top shows your position in the hierarchy.
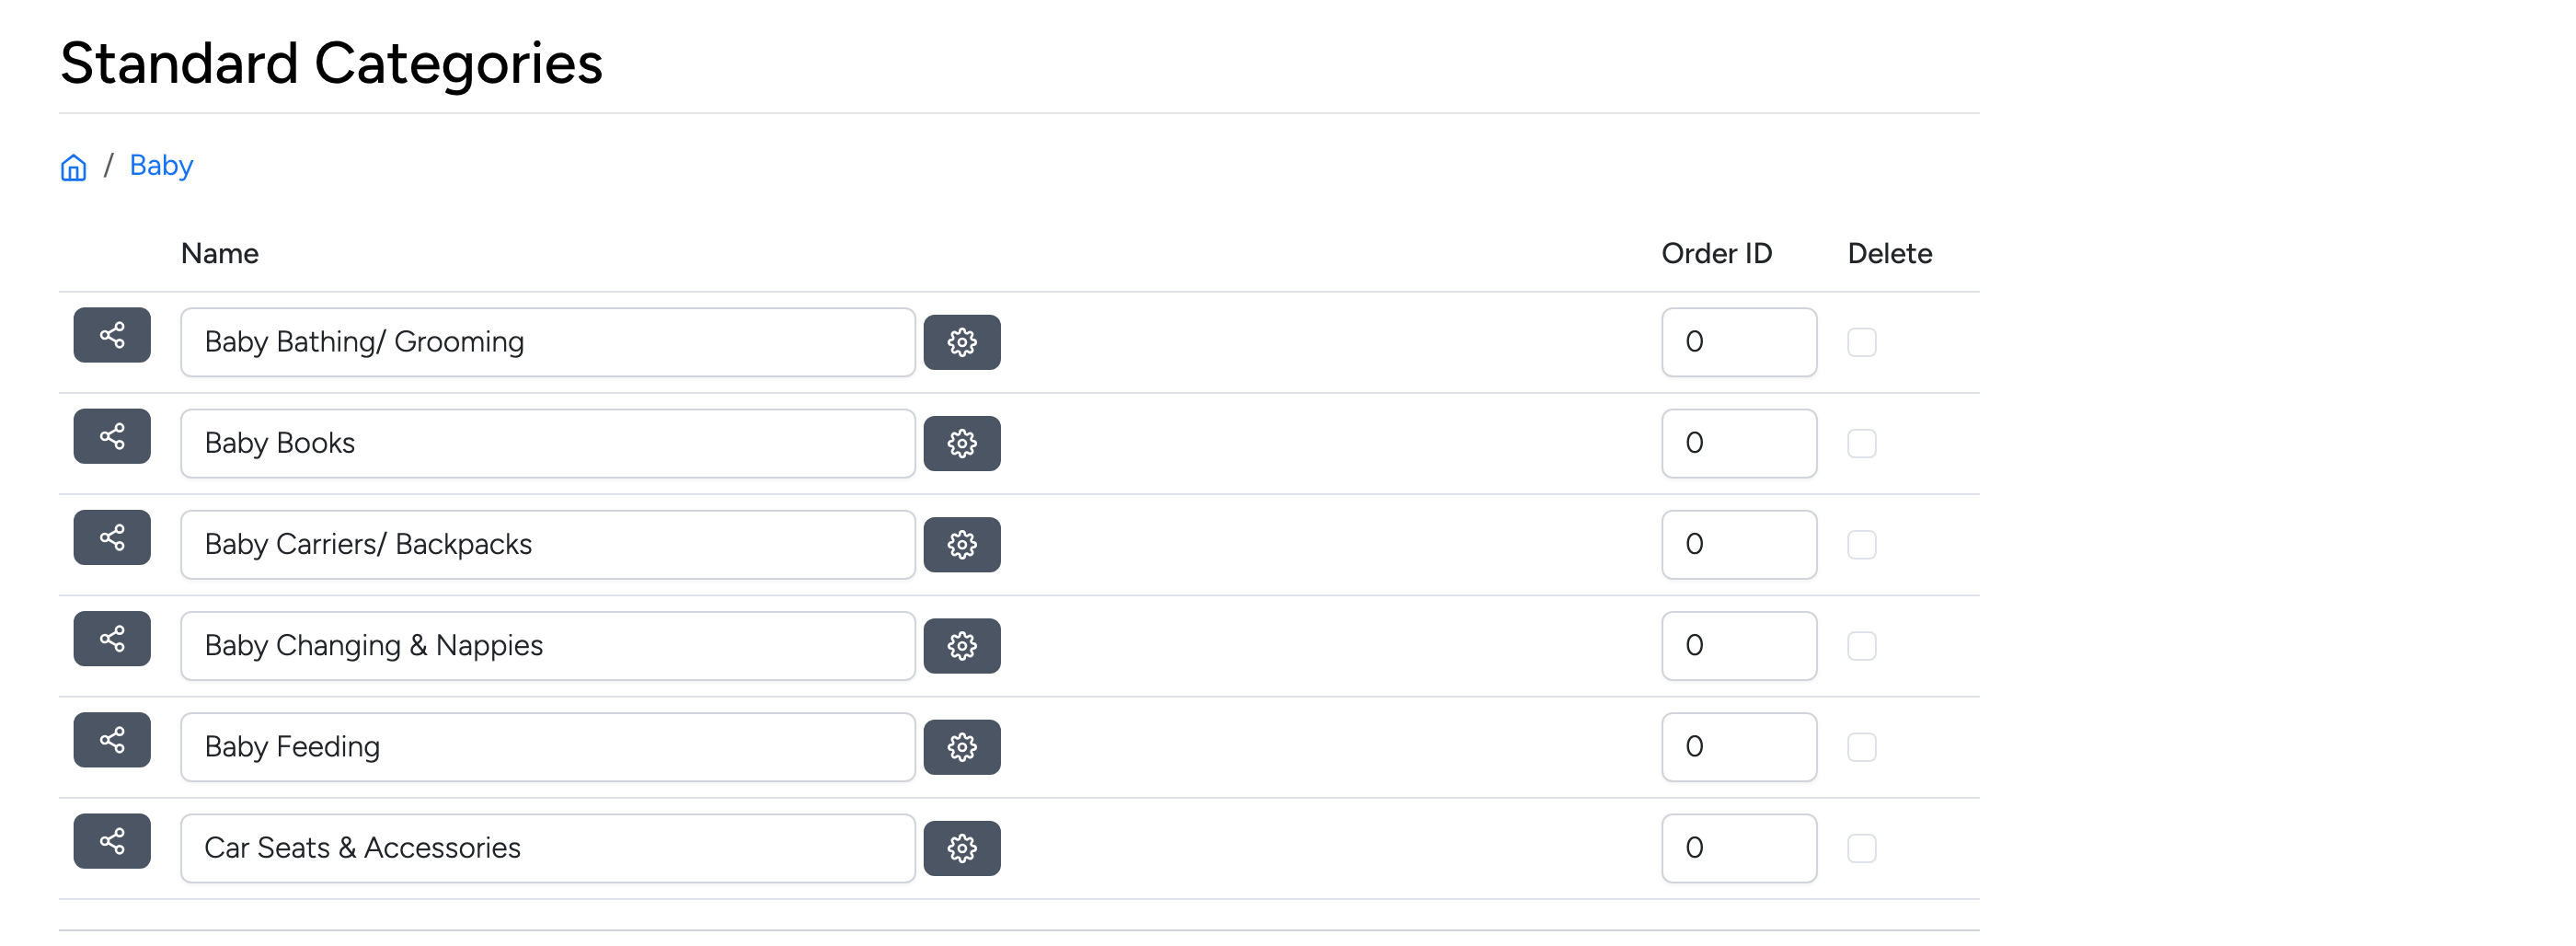
Subcategories work the same way as top-level categories — you can continue drilling down to create as many levels as needed. To add a new subcategory, type its name in the input field at the bottom of the list and click Update.
Category Options
Click the gear icon next to a category to open its options:
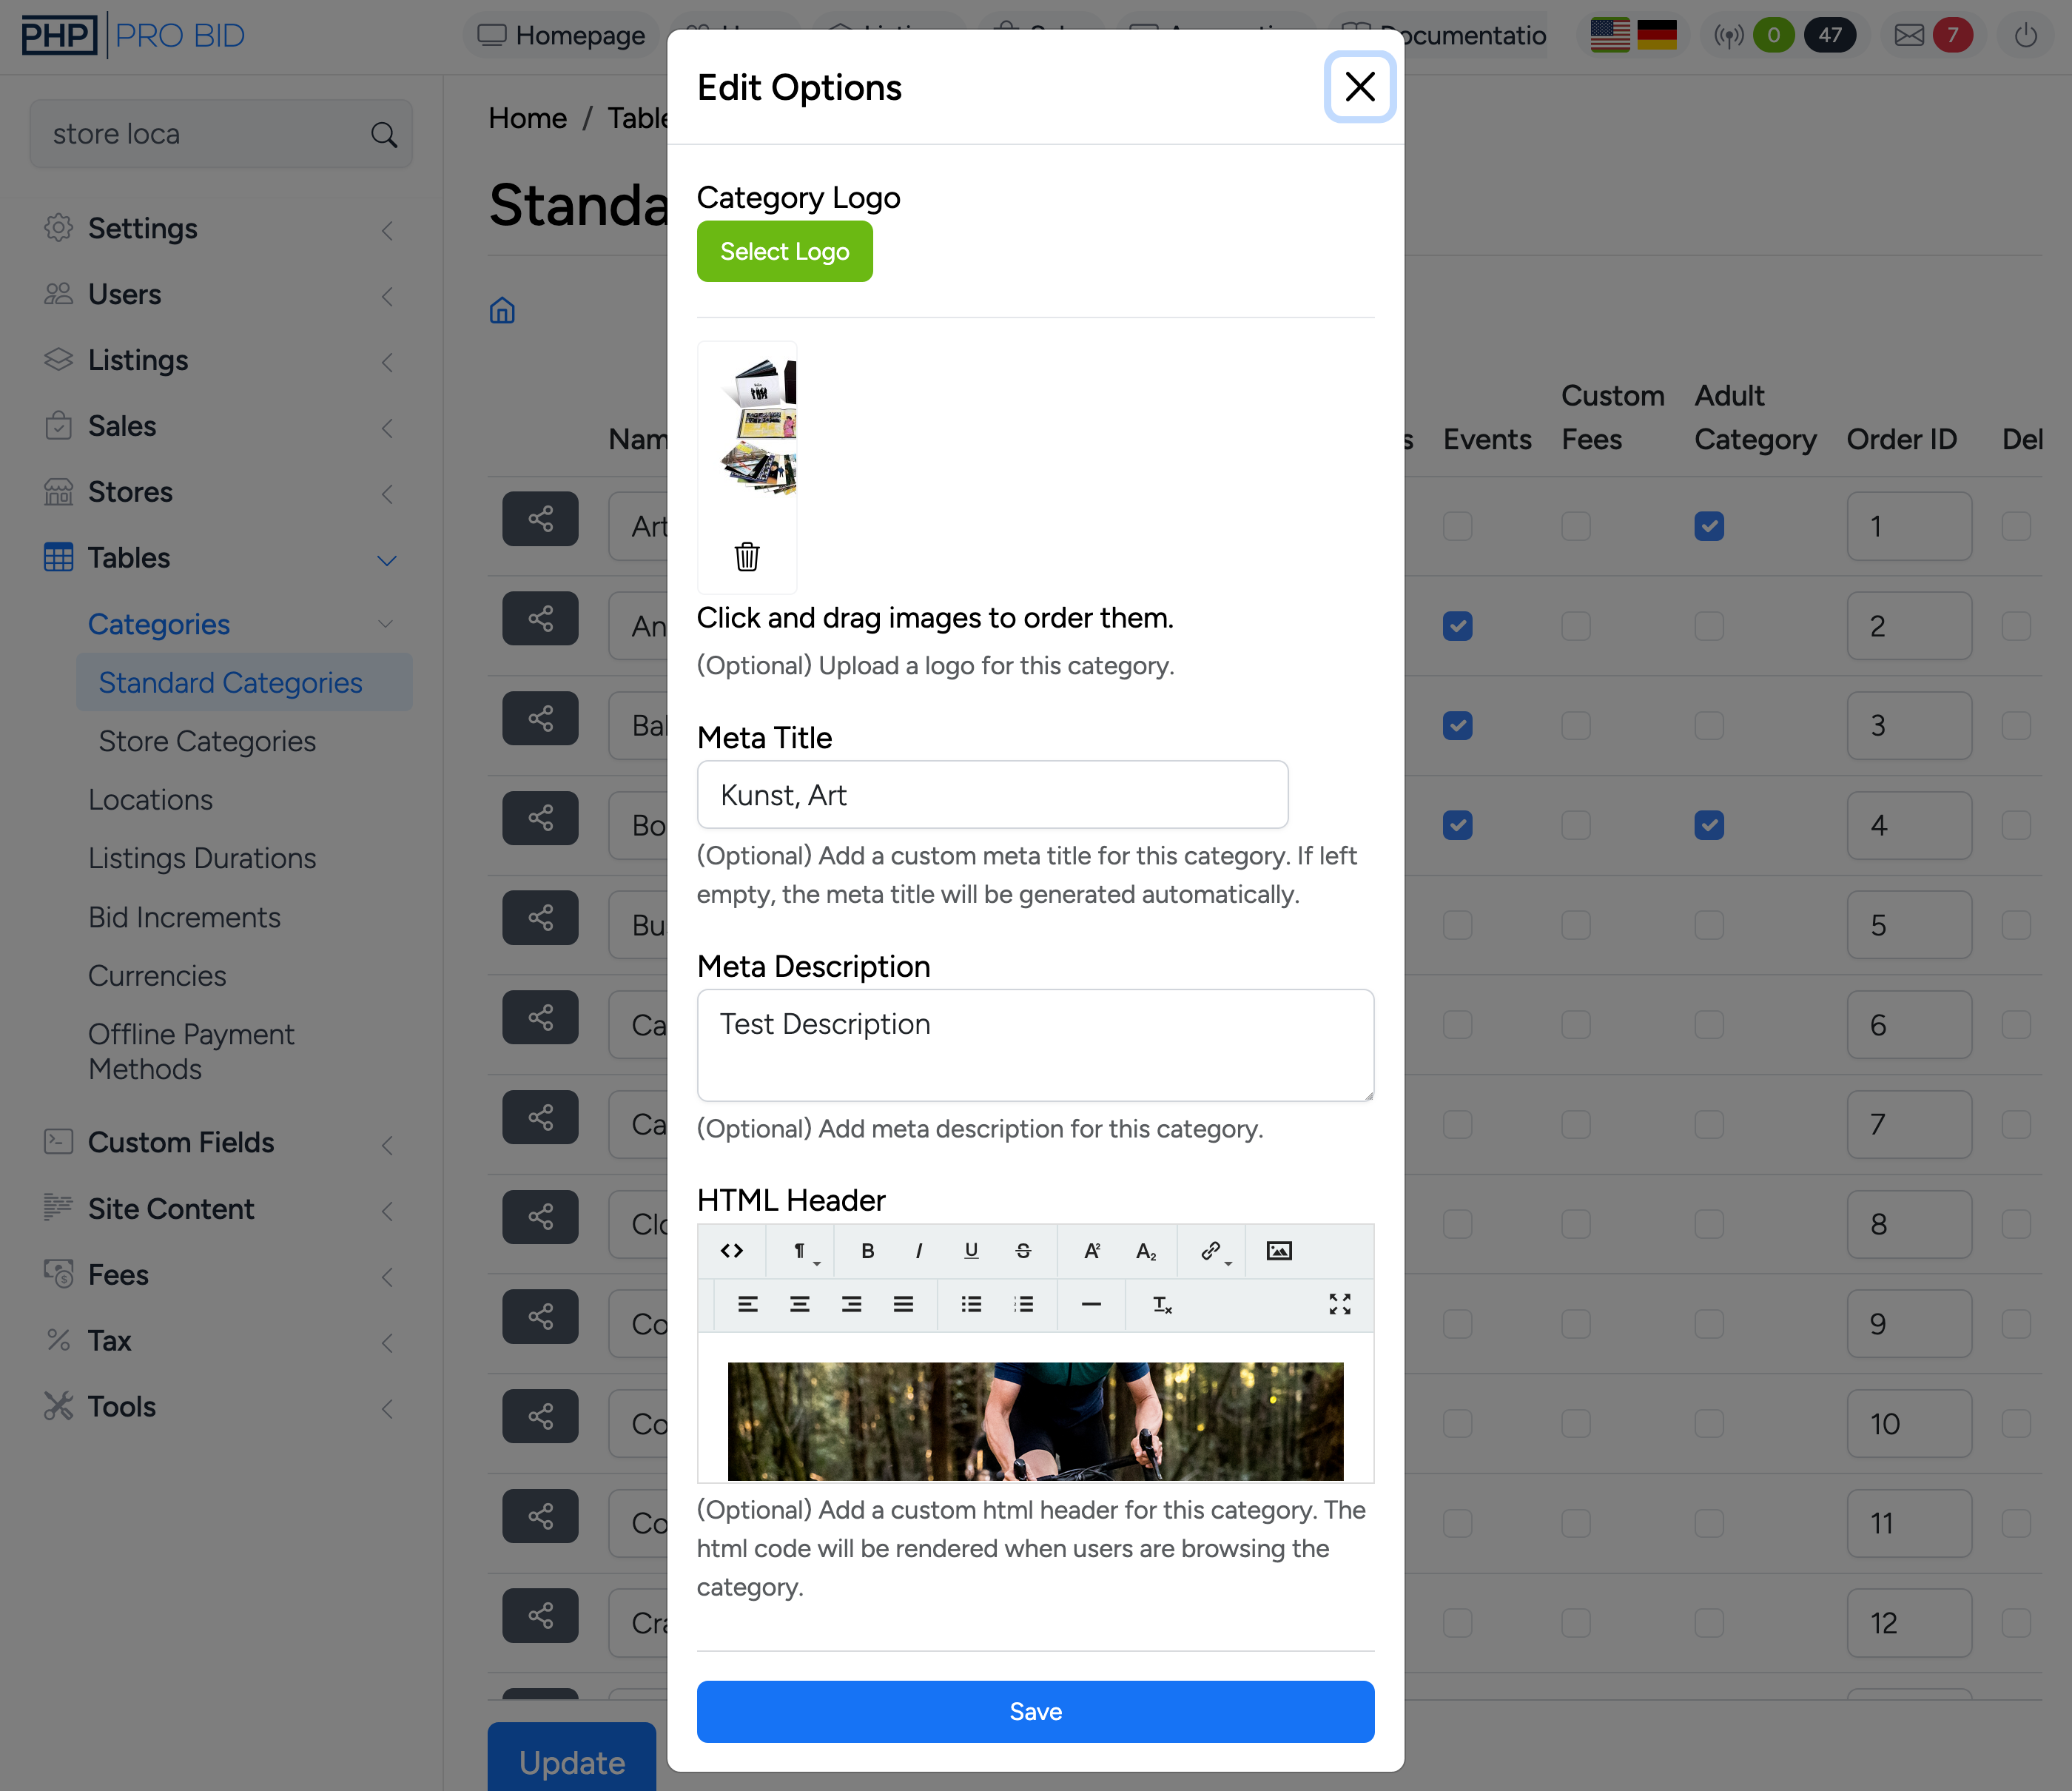
- Category Logo — upload an image to display alongside the category name in browse pages.
- Meta Title — a custom title tag for the category page. Auto-generated from the category name if left blank.
- Meta Description — a custom meta description for SEO. Keep under 155 characters.
- HTML Header — custom HTML content rendered at the top of the category page.