Account Settings
Your account settings live in the Members Area, accessible from the top-right corner of any page once you are logged in. From here you can update your personal details, manage your addresses, and adjust your account preferences.
Personal Information
The Personal Information page lets you update the details stored against your account. To access it:
- Click your username in the top-right corner and select Members Area.
- Navigate to My Account → Personal Information.
- Edit the fields you want to update.
- Click Submit to save your changes.
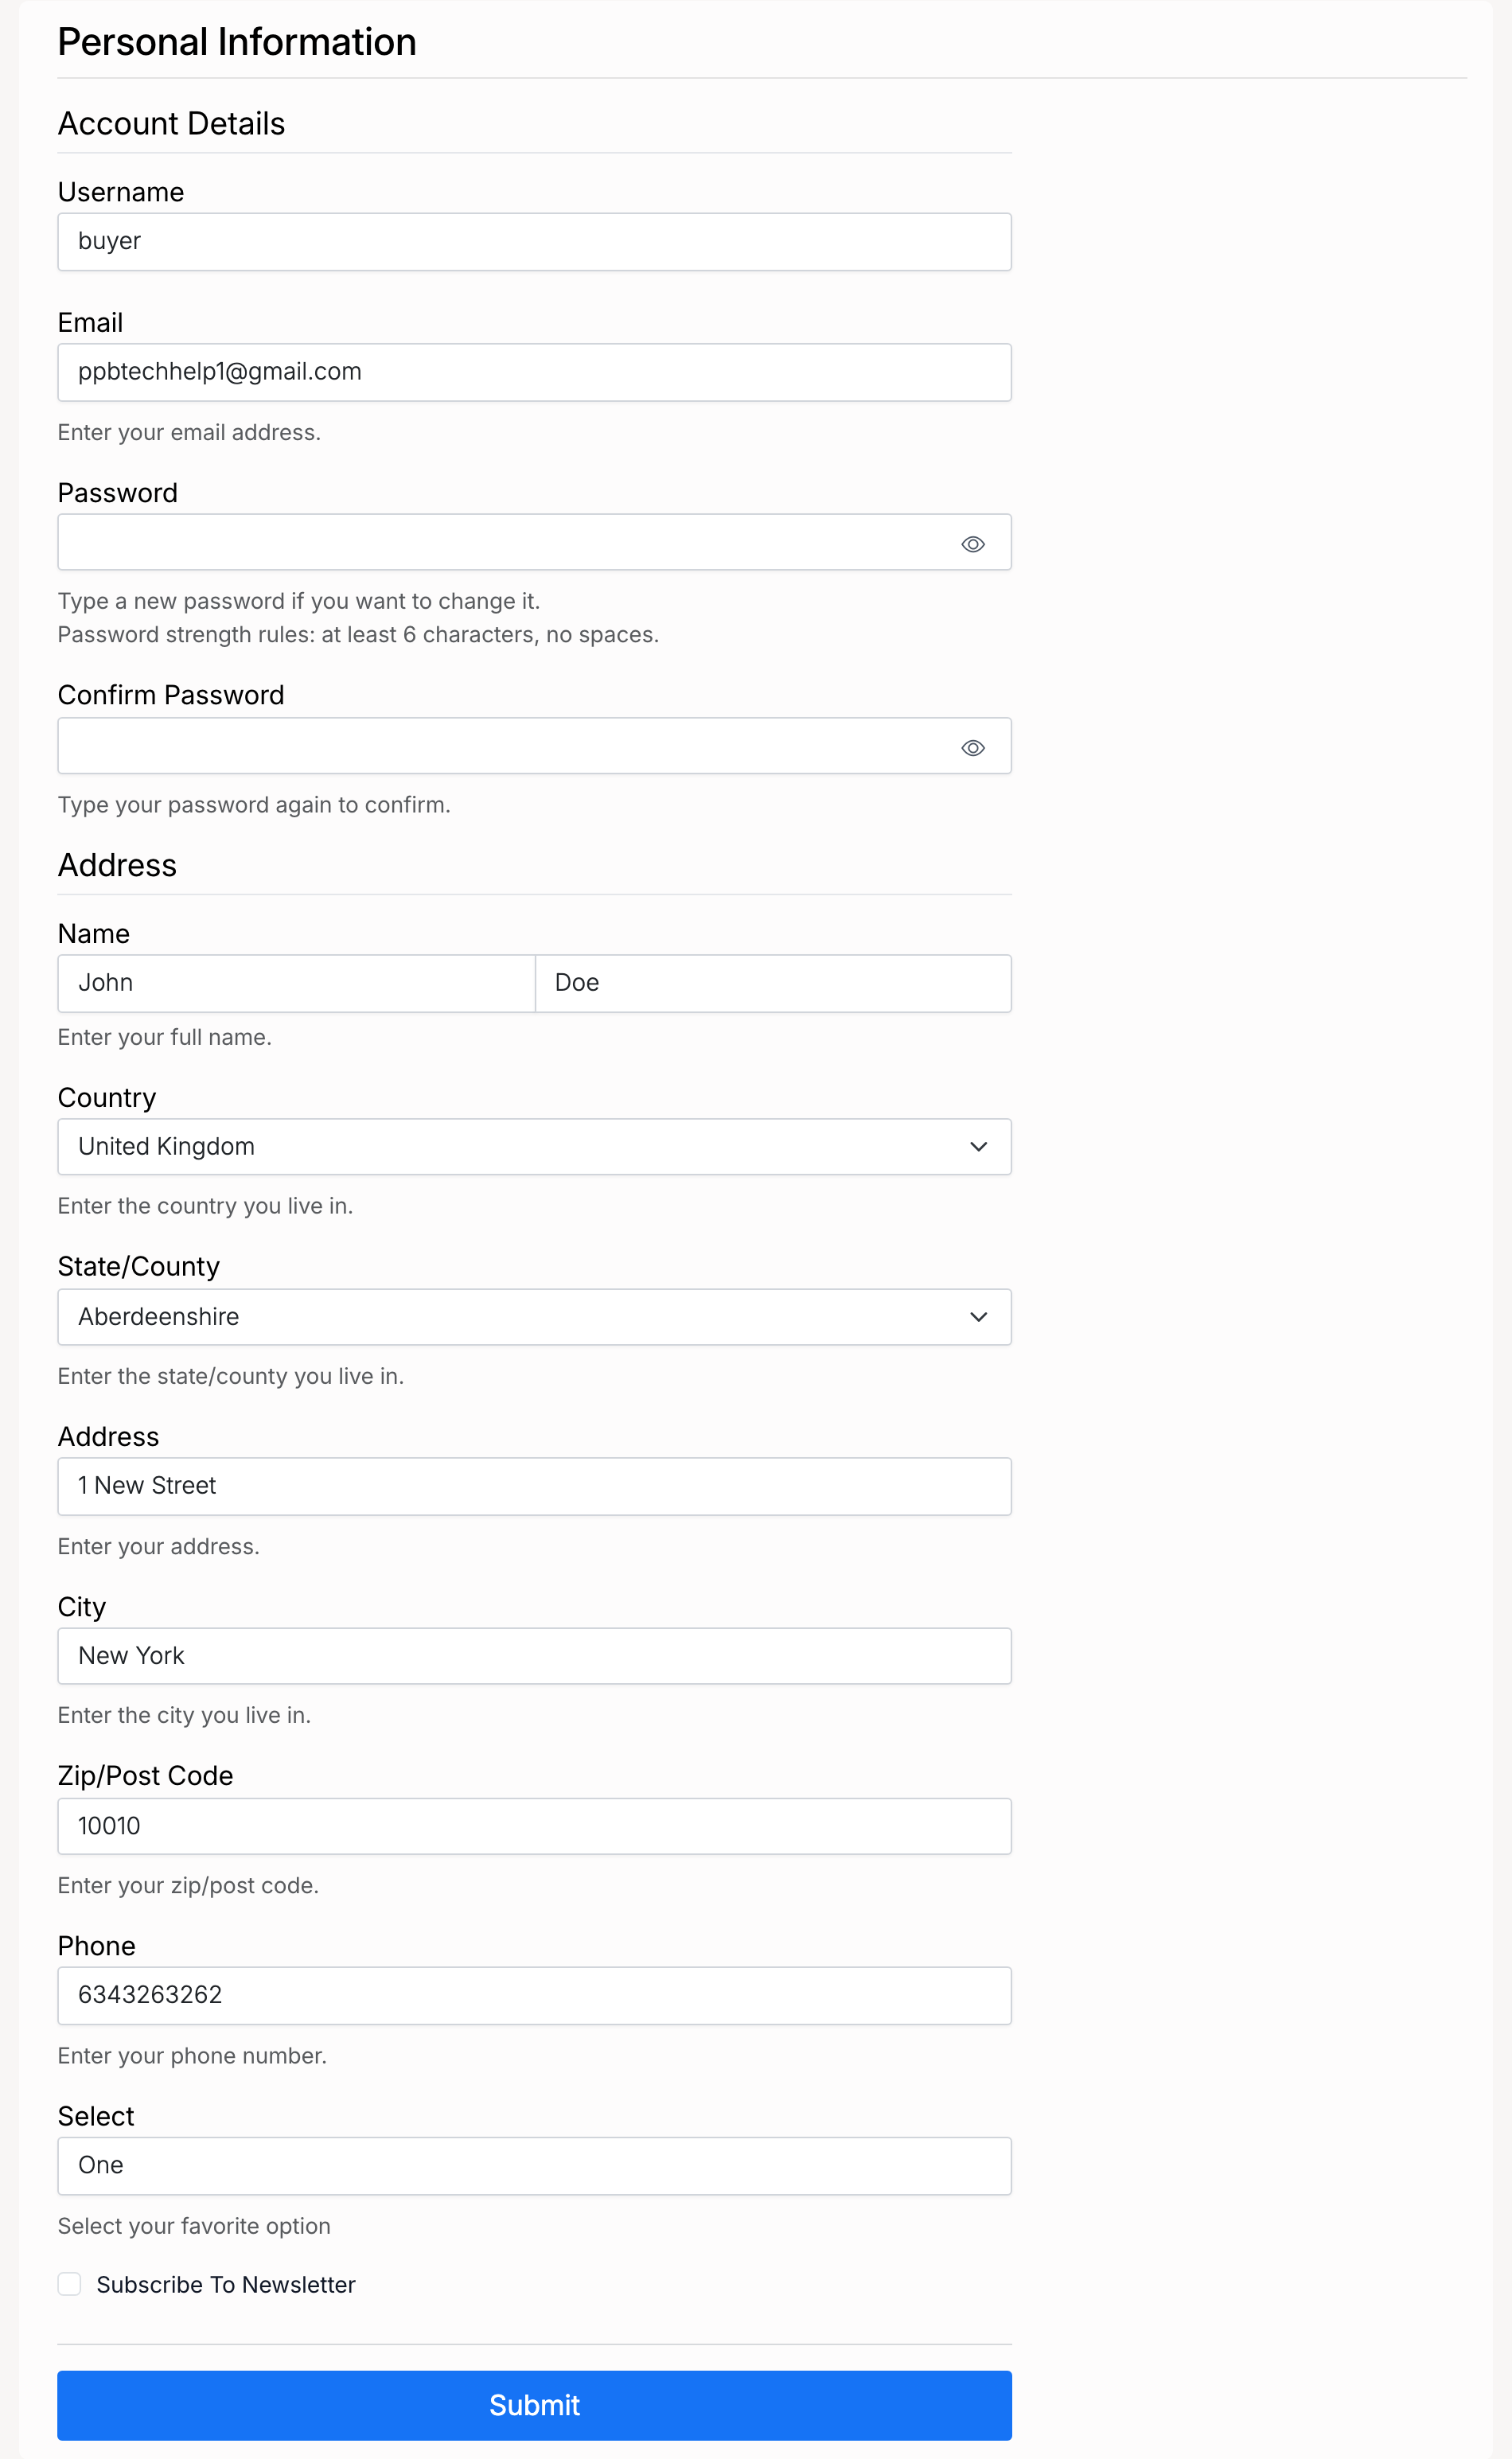
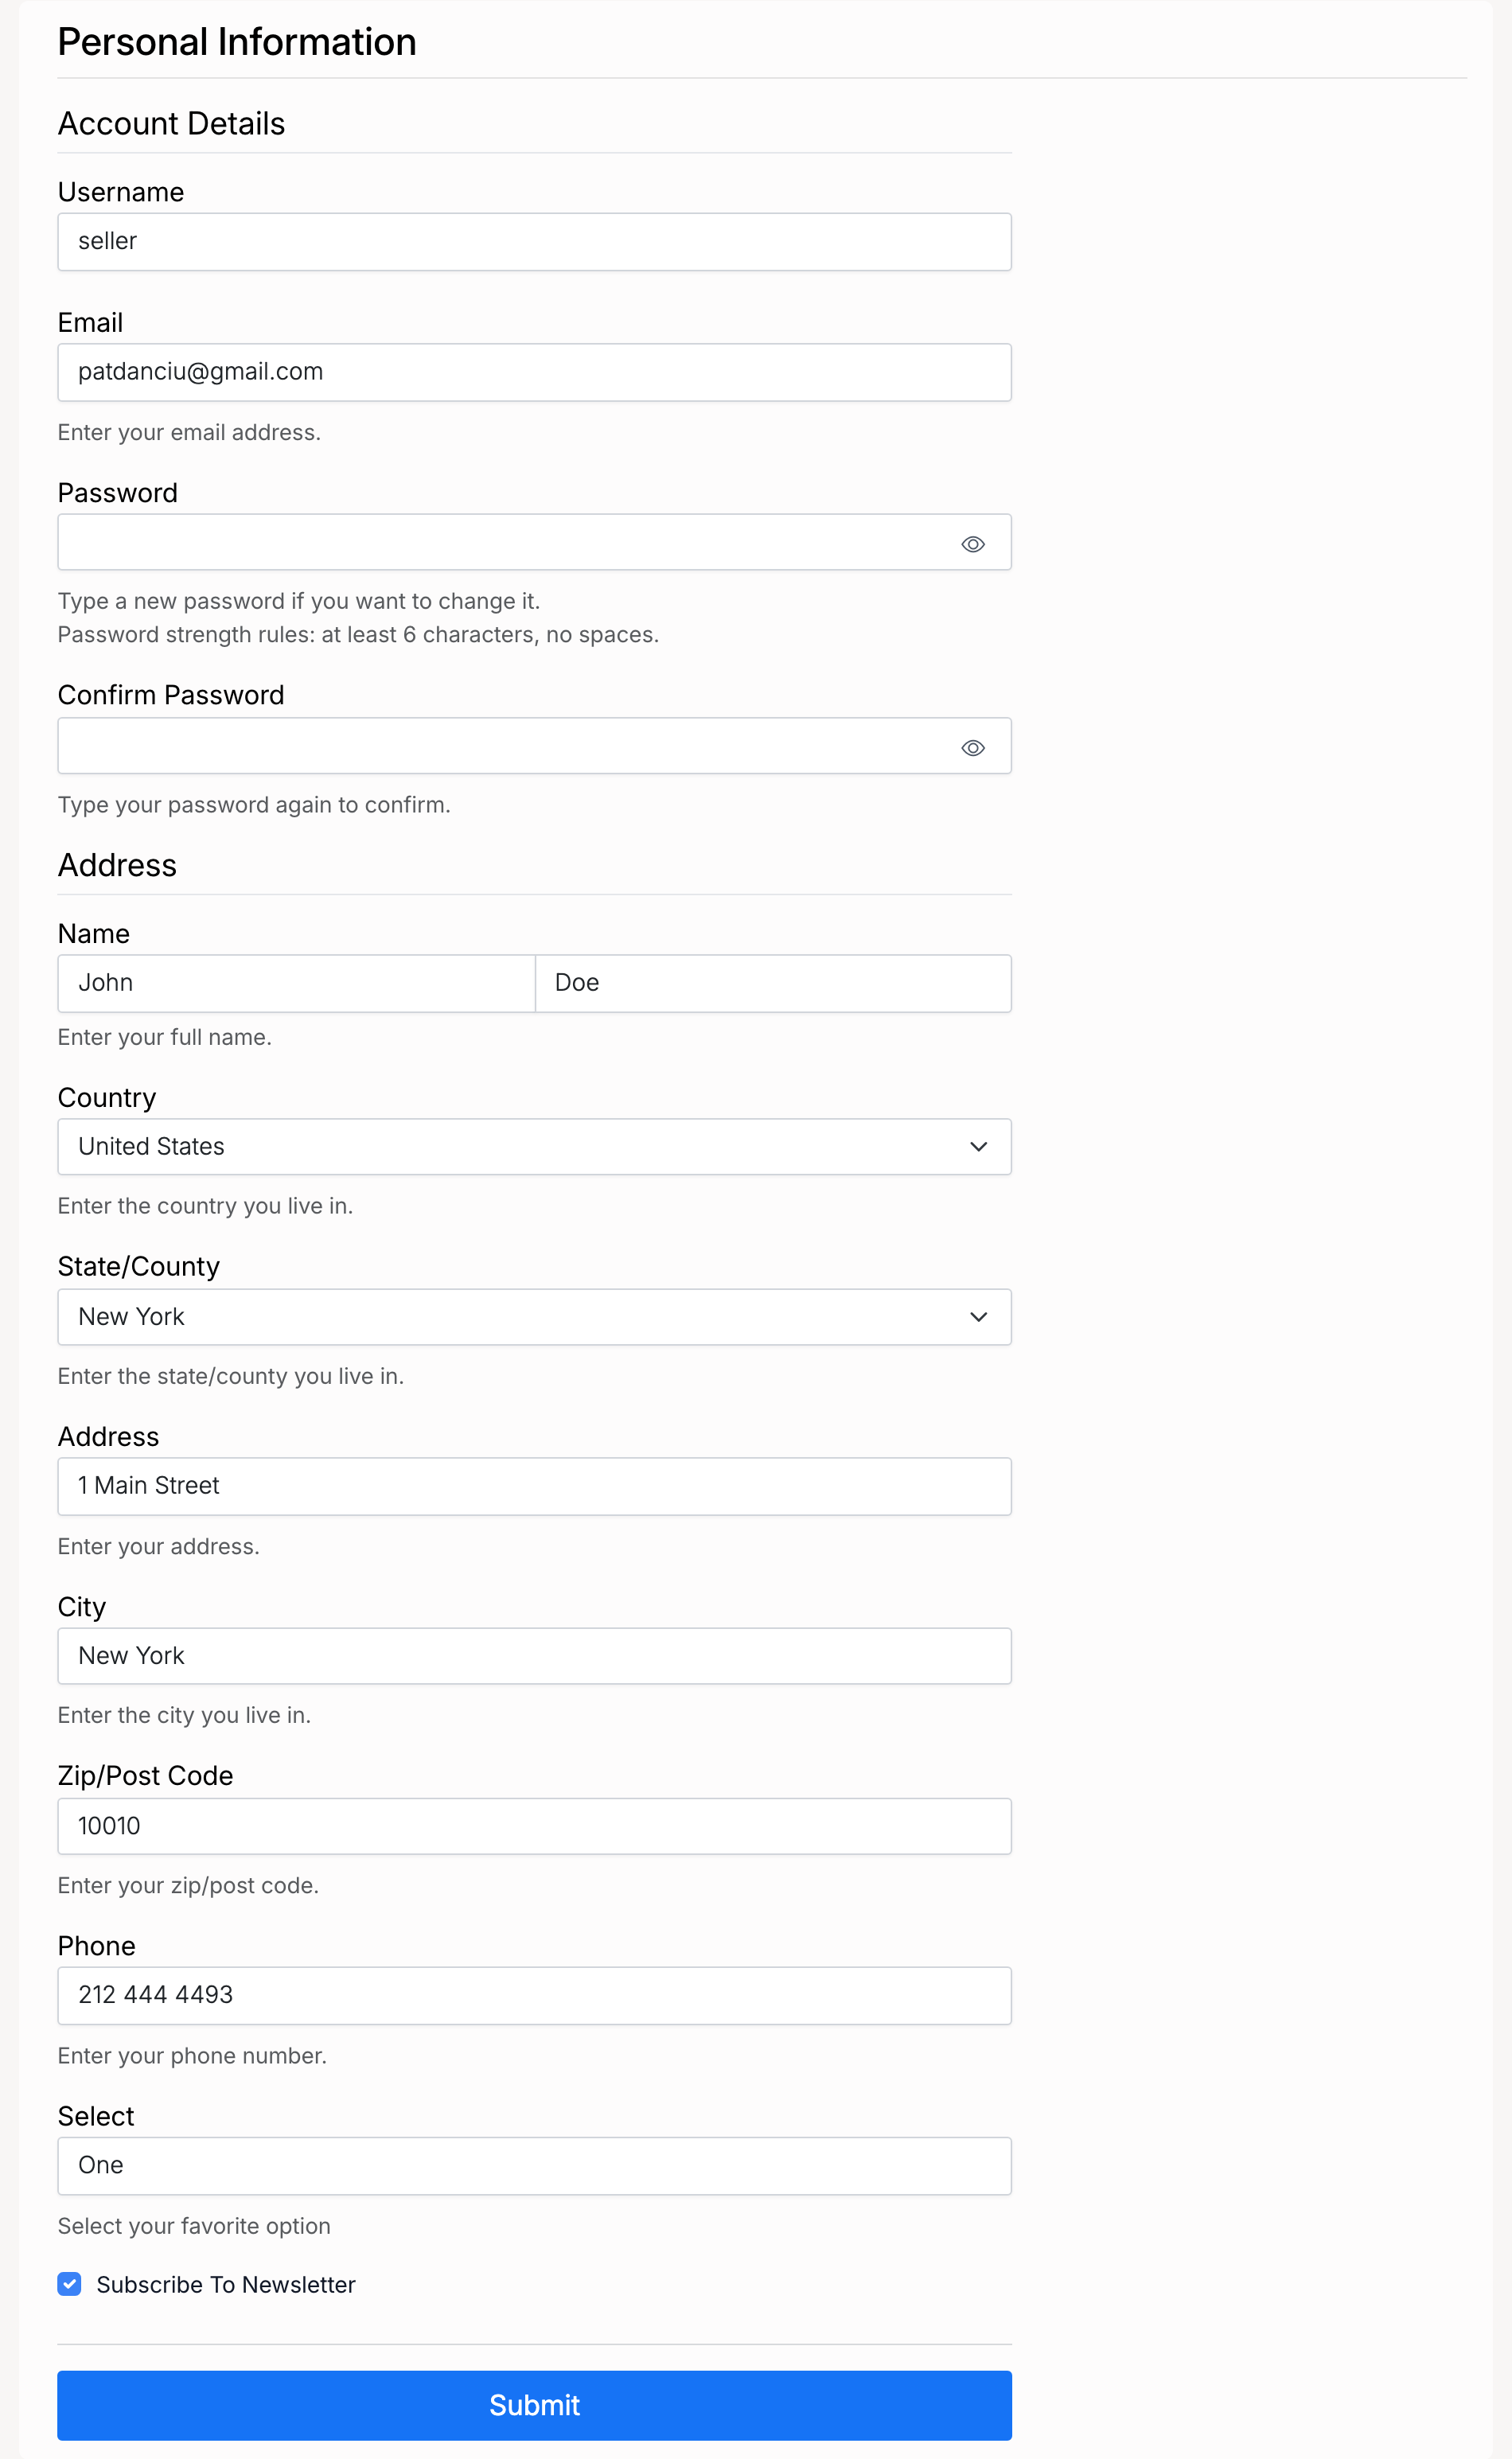
The Personal Information page is split into two sections:
Account Details
- Username — your public display name. This is permanent and cannot be changed after registration.
- Email — your account email used for login, notifications, and password recovery. Changing this requires confirmation (see below).
- Password / Confirm Password — type a new password if you want to change it. Leave blank to keep your current password. See Password & Security for strength rules.
Address
- Name (first and last) — used on invoices and correspondence.
- Country and State/County
- Address, City, Zip/Post Code
- Phone — used for seller or buyer contact; not publicly displayed.
- Select — a custom field configured by the administrator (may vary per site).
- Subscribe to Newsletter — opt in or out of site newsletters.
Changing Your Email Address
Changing your email address is a two-step process to protect your account.
- Enter the new email address in the Email field on the Personal Information page and click Submit.
- A confirmation link is sent to the new address. Your old address remains active until you confirm.
- Click the link in the email sent to your new address.
- Your account now uses the new email address for login and notifications.
Quick Registration Accounts
If you registered using Quick Registration (username, email, and password only), your profile will be missing a physical address. The site may ask you to complete your address the first time you make a purchase or list an item.
You can fill in your address at any time from My Account → Personal Information before you need it at checkout.
Seller Account Settings
Sellers have an additional Account Settings page under Members Area → My Account → Account Settings. This page lets you configure your seller profile and payment details.
- Account Type — choose Personal or Business. Business accounts can display a company name on invoices and listings.
- Company Name — your company or business name (visible on invoices).
- Bank Details — optional bank account details for direct payment from buyers.
- Stripe Publishable Key and Stripe Secret Key — enter your own Stripe API keys to receive payments directly to your Stripe account.
- Sales Invoices Custom Content — add custom text or HTML that appears on your sales invoices (e.g. return policy, VAT number).
Admin Settings
Administrators configure account payment options from Admin Control Panel → Settings → Users → Account Settings.
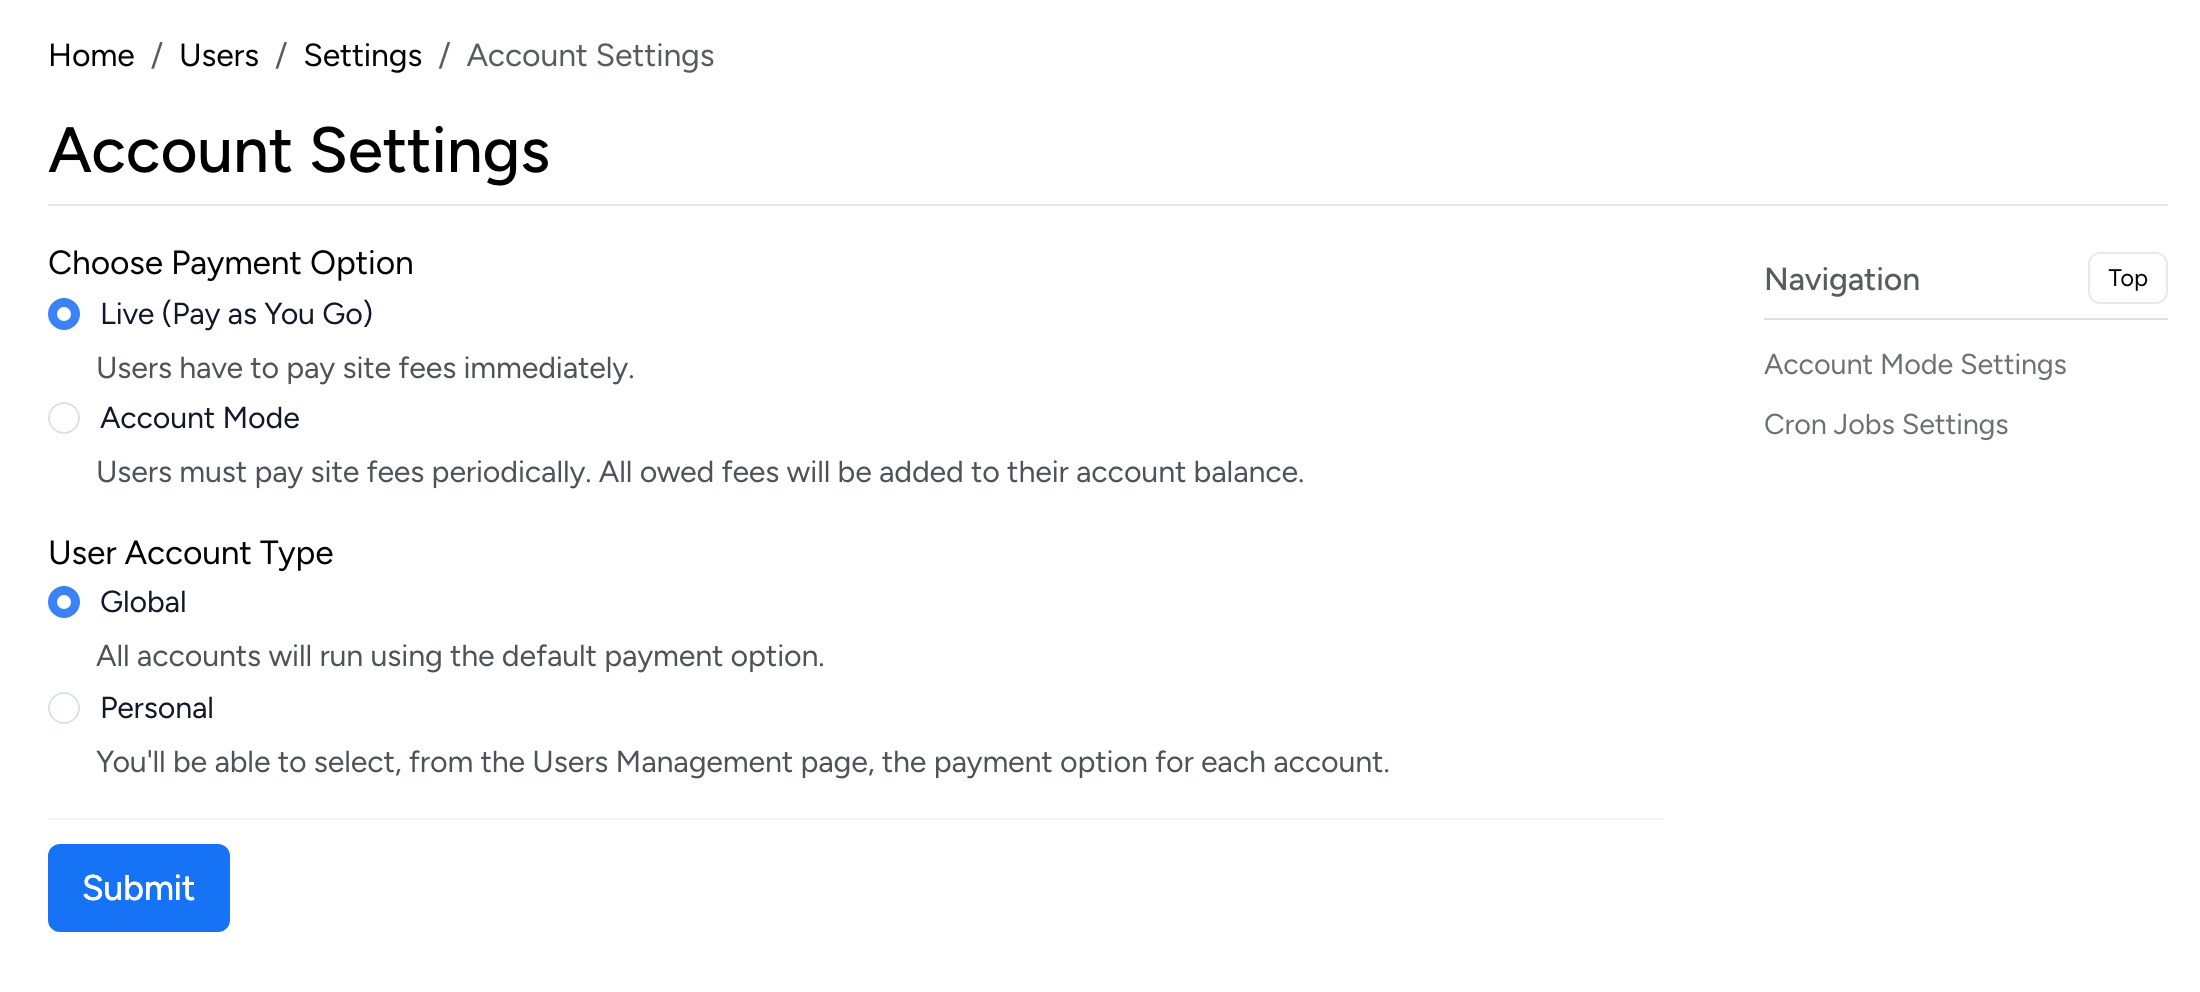
Payment Option
Choose how users pay site fees (listing fees, transaction fees, etc.):
- Live (Pay as You Go) — users pay site fees immediately as they are incurred. This is the default and simplest option.
- Account Mode — all owed fees are added to the user's account balance. Users settle their balance periodically rather than paying instantly. Useful for high-volume sellers.
User Account Type
Choose whether the payment option applies to all users or can be set per user:
- Global — all accounts use the payment option selected above. Simplest to manage.
- Personal — administrators can assign a different payment option to individual accounts from the Users Management page. Useful when some sellers need Account Mode while others pay as they go.